The Tag Import Tool allows for a simple workflow to copy tags from one Channel to another.
Sample Scenario:
Channels
- Channel A (Contains current 2022 Revit Content)
- Channel B (New Channel for 2023 Revit Content)
Content Location
- E:\\Example_Location\Revit2022\Library
- E:\\Example_Location\Revit2023\Library
Instructions:
- Copy all content from ‘E:\\Example_Location\Revit2022\Library’ to ‘E:\\Example_Location\Revit2023\Library’
- Upgrade all content in ‘E:\\Example_Location\Revit2023\Library’ to Revit 2023 using a bulk upgrade tool
- Index content from ‘E:\\Example_Location\Revit2023\Library’ into ‘Channel B’
- In Channel B, open the Channel Tools Lens and select the Tag Import Tool (Edit permissions in Channel required)
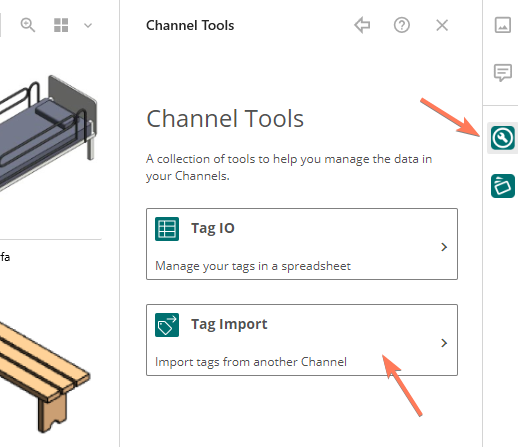
- Select to import tags from Channel A
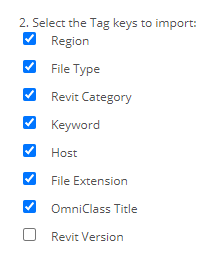
- Check the tag Keys you would like to copy. To prevent copying the incorrect version tag, uncheck the Key for Revit Version.
- Select Apply Tags to process. Done!
Please contact support@getavail.com if you need any assistance or have any additional questions around bulk upgrading your content to newer Revit Versions.