Important note: The Preview versions of the AVAIL Desktop 5.8 and AVAIL for Revit 5.8 must be installed together because they support Autodesk's upgrade to .NET 10.
Admins have access to download the Preview Release from the Manage Portal.
*** Reminder: Preview releases are not production-ready and are only available for select customers. We recommend installing the release for a limited group of users for internal testing.
Before you begin...
Content Submission is not enabled by default. Admins can turn on this feature and designate Submission and Reviewer user permissions by going to the Feature pages in the Manage Portal.

Reviewer permissions include the following:
- Ability to download and open submitted content from the AVAIL Desktop or AVAIL for Revit add-in.
- Make necessary revisions (implied permissions)
- Publish (Approve) or Decline submissions from the AVAIL Desktop.
*Reviewers do not need the Publisher Application Role to Publish (Approve) submissions.
Overview
The Content Submission workflow allows project team members to nominate content created or modified during a project for inclusion in the firm's standards library. Instead of relying on manual communication or periodic reviews of container files, users can submit content directly from Revit into a managed review process.
The workflow creates a clear path from:
Project Content → Submission Queue → QA/QC Review → Publish (Approve)
This ensures valuable content is captured, reviewed, and curated before becoming part of the firm's reusable standards.
Why Content Submission Matters
As projects evolve, teams frequently create or improve:
- Revit families
- Drafting views
- Details
- Sheets
- Other reusable content
Historically, identifying which content should be added to the library has been a manual process. Valuable content often remains inside project files because there is no formal mechanism for flagging it for review.
The Content Submission workflow addresses this by allowing users to identify reusable content at the moment it is created.
Benefits
- Capture valuable content before it is forgotten
- Reduce dependence on manual library audits
- Create a consistent QA/QC process
- Track who submitted content and where it originated
- Maintain library quality through controlled publishing
Step-by-Step Guide to Submit and Review Content in AVAIL
Step 1: Submit Content from a Project
Users working in Revit can submit content directly from a project.
Examples include:
- A cleaned-up manufacturer family
- A newly developed detail
- An improved drafting view
- Any content that should become part of the firm's standards
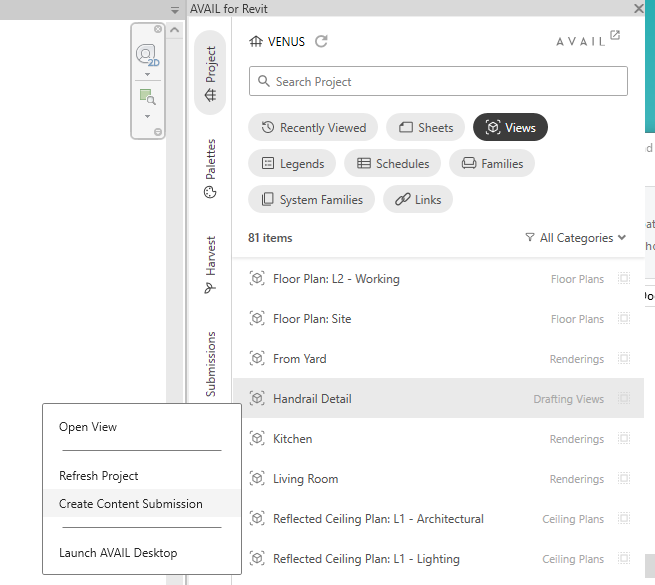
When submission privileges are enabled, users can select content, right-click, and choose:
'Create Content Submission'.
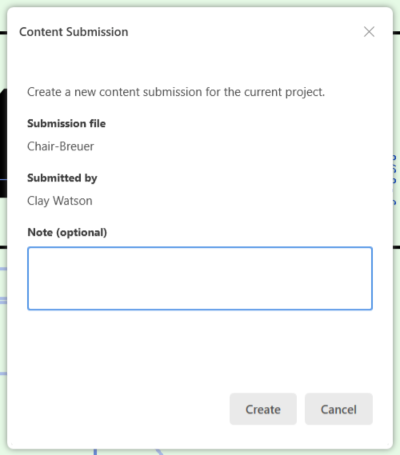
Behind the scenes: When content is submitted, AVAIL will upload a copy of the content to the AVAIL cloud. The content will then appear on the Submissions page in the AVAIL Desktop and AVAIL for Revit add-in, to then be downloaded for review.
Step 2: Content Enters the Submission Queue
Submitted content appears in a dedicated Submissions area within the AVAIL Desktop application.
The submission record includes:
- Submitter name
- Submission date
- Source project
- User Comment
- Other content metadata
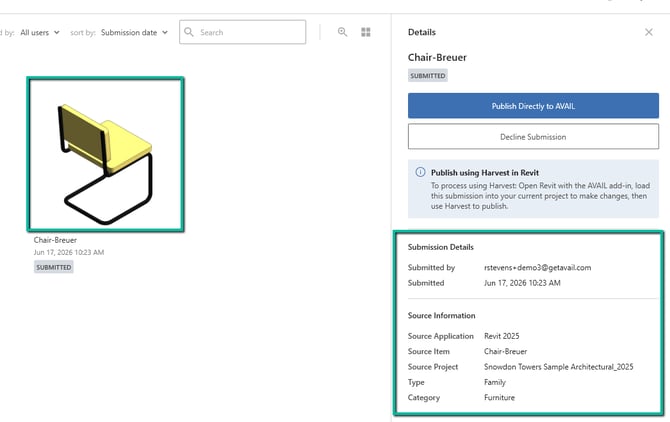
Important note: Publishers have the ability to Publish (Approve) or Decline a submission directly from the AVAIL desktop. Downloading content is not required to publish approved content to an AVAIL Channel.
Step 3: Open the Submission in Revit for Review (Optional)
Designated Reviewers can evaluate each submission before it becomes part of the library.
For RFA Submissions
-
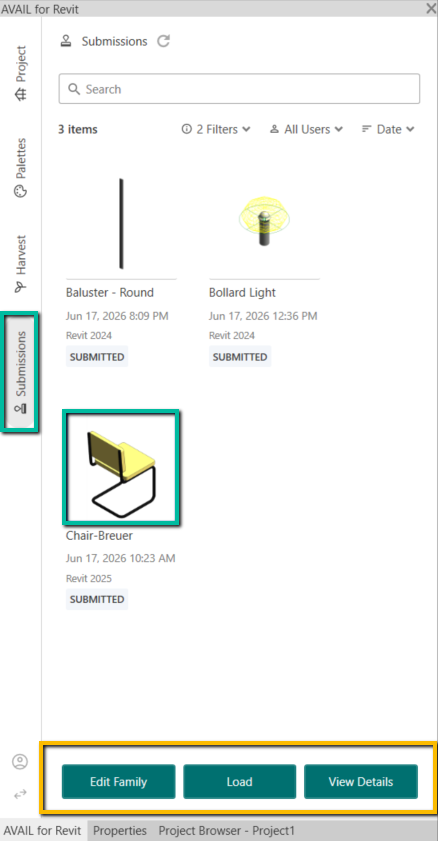
Open AVAIL for Revit, click on the Submission Tab, then select the content you'd like to review
-
Select Edit Family for RFA submissions (this will prompt the Family editor in Revit)
-
After editing the Family, do a File>Save in Revit.
Important note: Saving the file after you have made changes will update the submission in the AVAIL local submission cache (where the content was first downloaded).
Please advise: For RFA submissions, the submission status will remain as 'Submitted' unless the Family is being opened and managed in a Harvest-tracked container file. AVAIL only knows if the submission is 'In Review' if the container file is being tracked by Harvest.
For 'loose' Family submissions, the Family can be edited in Revit, saved (to the local submission cache location), then published to an AVAIL channel. Once the content is published, the submission status will be updated to 'Approved'.
For RVT Submissions (Drafting Views Managed in Container Files)
-
Select Load if you are reviewing an RVT in your Harvest-tracked Container File.
- Loading a Drafting View into a Harvest-tracked Container file will automatically update the submission status to 'In Review'.
- Read this article to ensure your container file is being tracked by Harvest.
- Make any necessary changes, then right-click to Mark as ready.
- This will add the RVT to the Harvest tab, under the 'Not Published' list. Check the box next to the element to publish to AVAIL.
OR - Alternatively, if no changes are required, you can select Publish in the Harvest Queue tray.
- Using Harvest to publish the RVT submission to your AVAIL library will automatically update the submission status to 'Approved' in the AVAIL Desktop.
Image for Load option under the Submissions tab
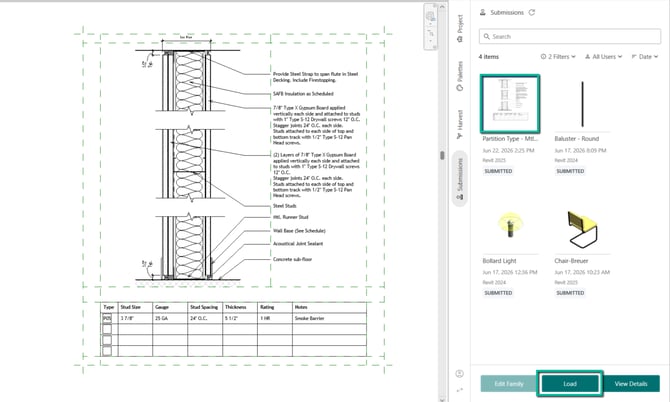
Image of 'Mark Ready to Publish' dialogue
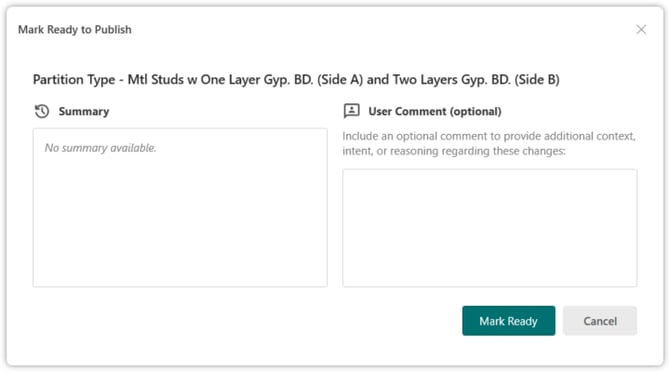
Image of Harvest Queue tray

Step 4: Publish (Approve) or Decline the Submission
After content is submitted and/or reviewed in Revit, Reviewers can choose to:
Publish (Approve) the content directly to an AVAIL channel and add it to the standards library.
or
Decline the submission if it does not meet standards or is not appropriate for reuse.

Please advise: Publish (Approve) and Decline actions are only available in the AVAIL Desktop.
Final Step: Fill in Approve or Decline details
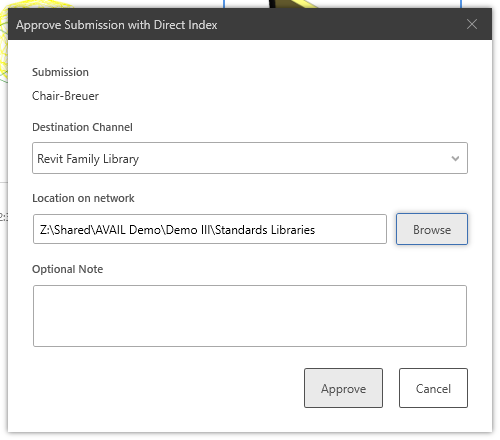
For Approvals
Select your Destination Channel and Location on the network, then click Approve to complete the Content Submission workflow and add the content to your AVAIL library!
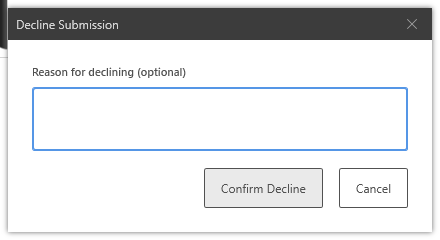
For Declined Submissions
Fill in your Reason for declining (an optional step), then click Confirm Decline.
Also in Preview! Learn about Harvest Change Tracking and AVAIL's Difference Engine in this article.