
Summary
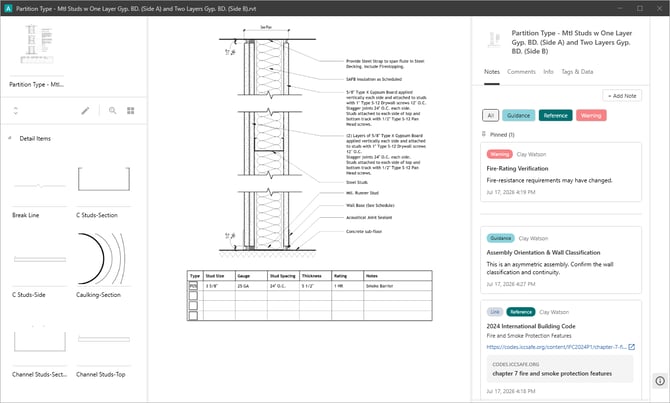
Content Notes provide additional text-based information, guidance, or references for any indexed content in AVAIL. A Note can contain written instructions or a link to internal and external resources, such as SharePoint documents, product websites, training videos, standards, or other supporting documentation.
The defining characteristic of a Note is that it adds information about the content rather than representing another reusable content asset.
Guiding question:
“Is this information about the content rather than another piece of content?”
If the answer is yes, it should generally be a Note.
Multiple Notes can be associated with a single content item and organized using Note Labels, allowing firms to standardize categories such as:
-
Product Information
-
Training
-
Firm Standard
-
Guidance
-
Sustainability
-
Approval Status
Content Note Permissions:
Admins can assign Contributor and Reviewer permissions to delegate who can create, review, pin, and mark notes as Official.
Go to the Manage Portal to adjust permissions under the Features menu (pictured below). 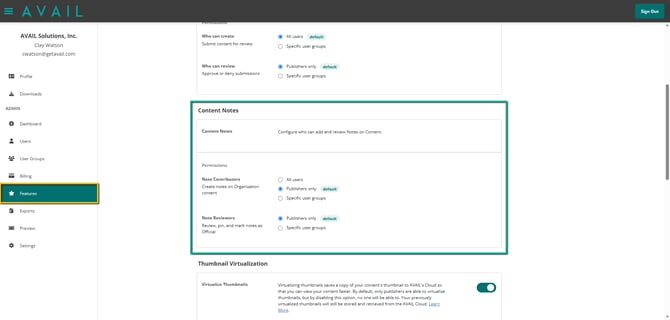
Step-by-Step Guide
Step One: Establish your Note Labels
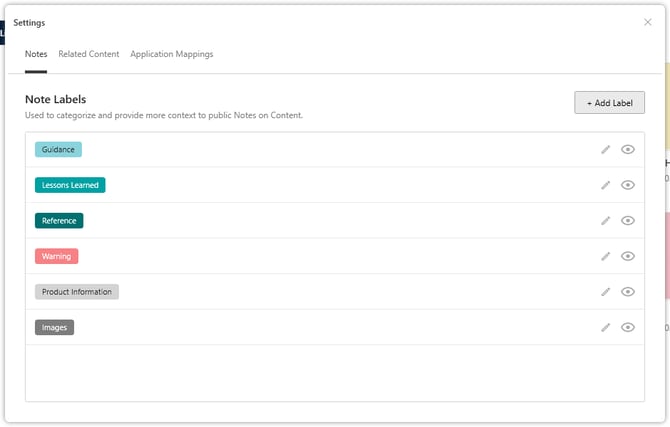
Publishers in AVAIL can create and customize Note Labels from the Settings Menu.
-
Click Your Name in the upper corner of the AVAIL Desktop.
-
Go to Settings.
-
Some default Note Labels will be listed. You can Edit the labels by clicking the Pencil icon or Hide the label by clicking the Eye icon.
-
To create a new Label, select +Add Label.
- Enter a name for the label, then select the background and foreground text colors to customize the look and feel of the label.
- Remember to click Save.
Step 2: Create a Content Note
Users with Contributor permissions can add Content Notes by clicking the Content Notes panel button or clicking the content name to open the Content Preview.
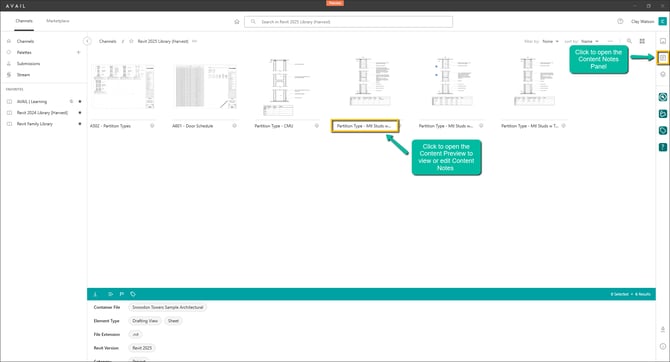
- After opening the Notes panel, click +Add Notes.
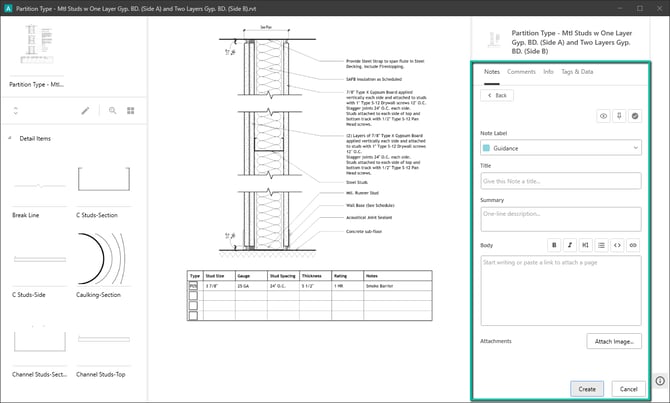
- Select a Label from the drop-down menu, then fill in the Title, Summary, and Text Body of the note.
- You can add Attachments or Insert URL links into the Body of the note.
- Once you are finished, select Create.
Step 3 (Optional): Select a Note behavior
When creating Content Notes, you have the following options to hide, pin, or mark a note as verified:
Set as Private Note | Visible only to you.
Pin Note | Keep this note at the top of the list.
Mark as Verified | Displays as official and trusted information.
Best practices
Use Notes when:
- The information explains, qualifies, or provides guidance about the content.
- The resource primarily exists for reference rather than reuse within AVAIL.
- The connection is to an SOP, training resource, product page, policy, or external documentation.
- A user needs context to understand how, when, or why to use the content.
- A standardized Note Label would help communicate the purpose of the information.
Learn more about the difference between Related Content and Content Notes in this article.